
Arches National Park: Tips for Photographing the Rock Formations
In the high desert of eastern Utah, Arches National Park is a red rock wonderland containing over 2,000 natural sandstone arches. This iconic national park is world-renowned for its fanciful rock structures carved by erosion over millennia. The swirling patterns, soaring fins, and maze-like passages create an almost alien landscape. Capturing photos of these otherworldly formations is a dream for landscape photographers, but it takes skill and preparation. This guide provides tips for planning your photo shoot, scouting locations, using proper gear, and editing techniques when photographing Arches National Park. Follow these, and you’ll come away with stunning images of the park’s unique geology.
Plan Your Visit for Ideal Conditions
The desert environment of Arches means weather conditions can vary dramatically throughout the day and year. For the best lighting, plan photo shoots near sunrise or sunset when the low angle warms the red rocks into glowing. Early morning hours also tend to have fewer visitors, making them calmer. The summer brings blazing sun and monsoon storms in the afternoon, so schedule mornings for photography during these months. To experience moderate temperatures ideal for comfortable hiking and avoid crowds, plan your visit to Arches National Park in the spring or fall.
Pack Proper Photo Gear
The park’s rocky expansions, sheer walls, and arches necessitate a versatile lens kit. A wide-angle lens captures giant formations, while a telephoto isolates details in intriguing textures. A circular polarizing filter deepens blue skies against red rocks for heightened drama. At night, a sturdy tripod allows for long exposures of the Milky Way. Pack extra batteries and memory cards since you may shoot hundreds of photos. Above all, have a sturdy but lightweight tripod to take full advantage of magical sunrise and sunset moments.
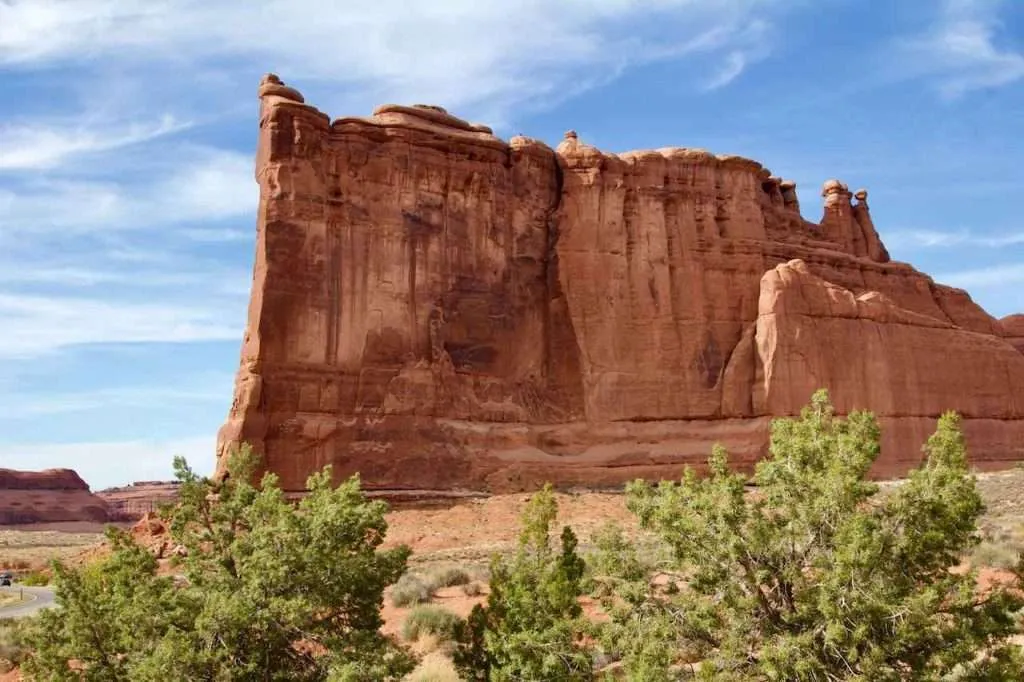
Scout Locations and Compose Strong Foregrounds
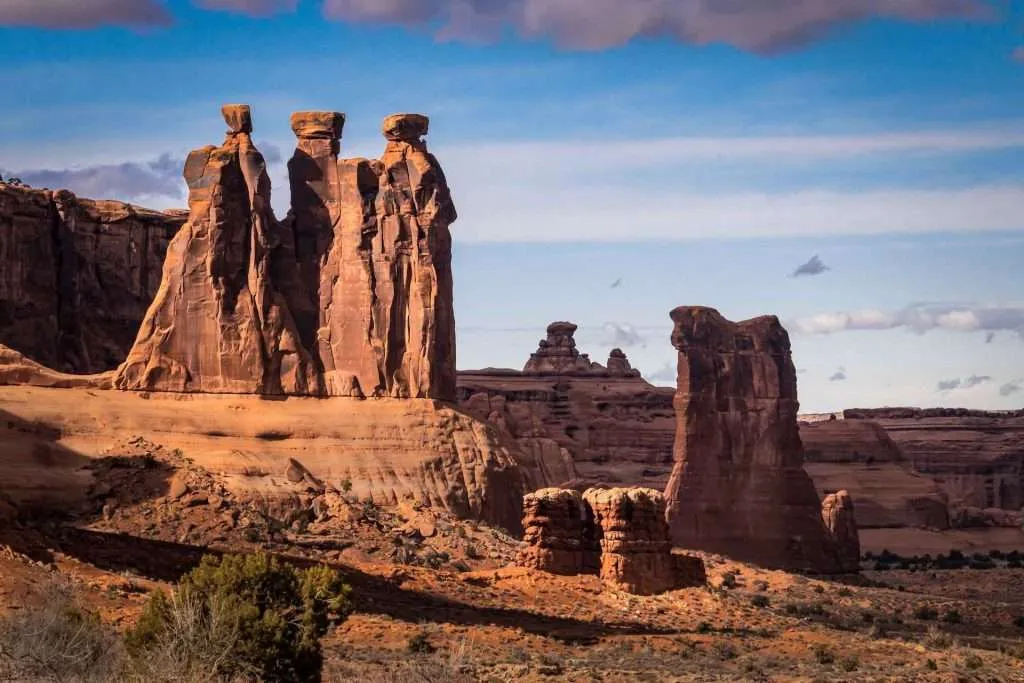
Study park maps to identify named rock structures for photography. Focus on significant arches like Delicate Arch, but also find lesser-known formations. As you explore various vantage points in the park, dedicate time to survey the landscape from each one, carefully analyzing potential subjects and compositional elements to incorporate into your photographs. Shoot from multiple angles and elevations to achieve the most compelling image. A vital foreground element like a textured canyon wall or juniper tree adds depth and scale. Frame the sun peeking over a fin or arch for interest.
Master Light and Shadow
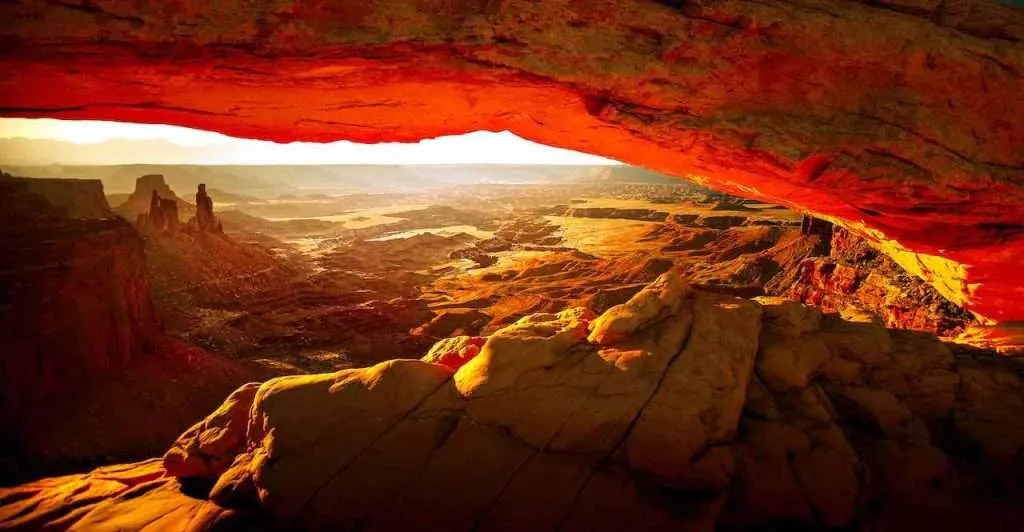
The interplay of light and shadow on the park’s sandstone forms creates captivating photographic opportunities. At midday when the overhead sun flattens lighting, concentrate on details in textures and patterns. During the golden hours near sunrise and sunset, sidelight casts shadows to accentuate shape and form. Backlighting at sunrise spotlights arches and fins in a fiery glow. Observe how the changing angle of light transforms the rocks through your lens.
Work Around Changing Weather
The arid climate of Arches makes weather unpredictable. Sudden rainstorms may temporarily limit photography, but clouds add drama to the expansive skies. Work fast to incorporate the ever-shifting interplay of light and weather. If skies turn gray, intensify colors in post-processing. Formations like Double Arch can be shot from sheltered spots during storms. Adapt and see bad weather as a chance for moody, evocative images.
Post-Process for Maximum Impact
The magic truly happens when reviewing and editing your images. Adjust contrast, clarity, and vibrance to make the red rocks pop. Careful cropping creates compelling compositions. Careful dodging and burning sculpts the light and shadow. Stitching panoramas captures the expansive vistas. Remove distractions like cars or hikers. Finally, convert images to black and white to masterfully isolate the majestic forms, shapes, and textures. Take time to finesse your photos for professional-level results.
Shoot The Signature Arches
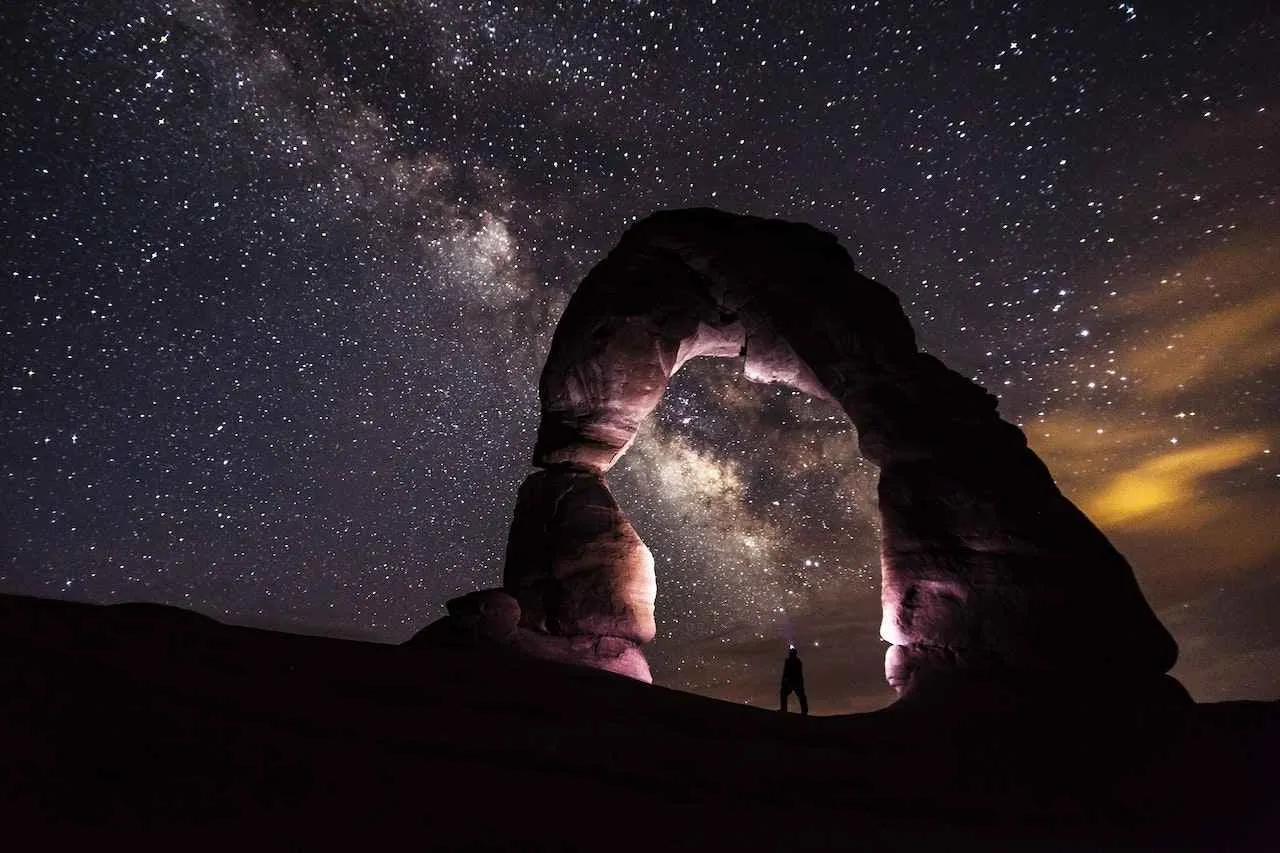
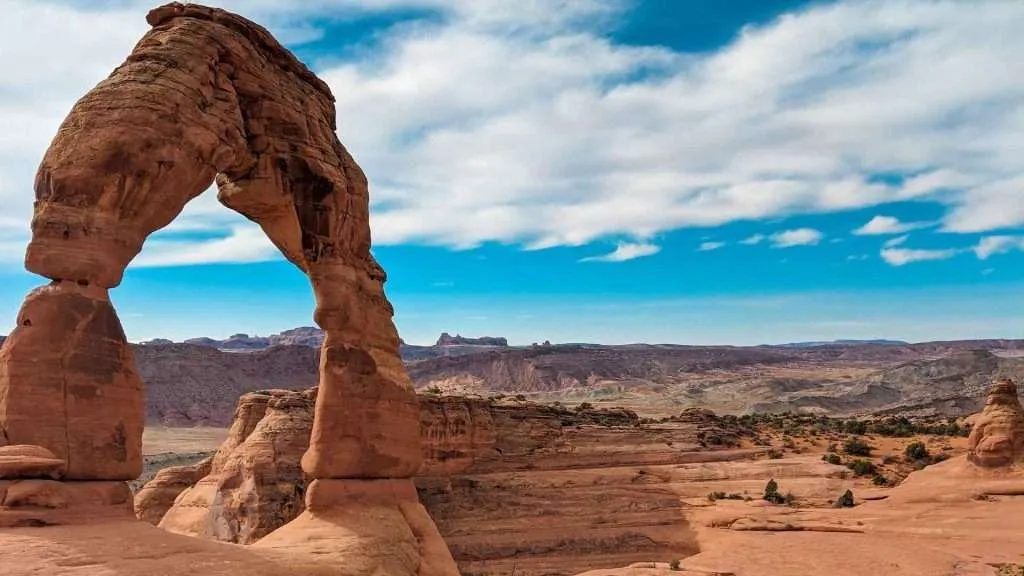
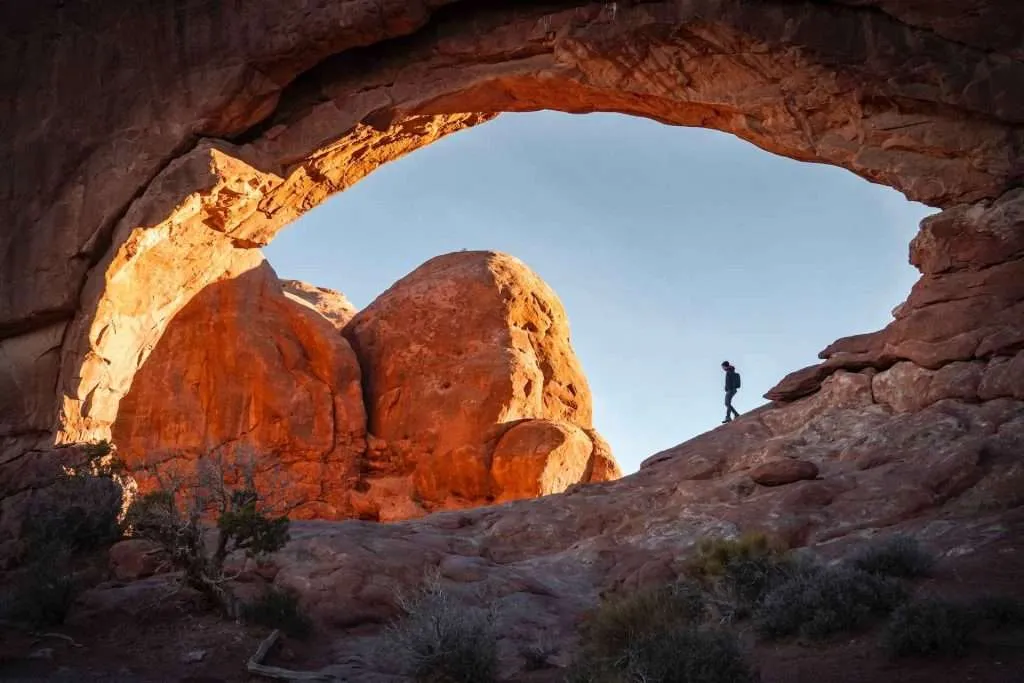
While lesser-known formations have appeal, the famous named arches are stars for a reason. Delicate Arch commands sunset shots, with the tiny span framed by the towering fins around it. For the North Window, incorporate the view of looking through the arch to the distant landscape beyond. Capture the glowing Turret Arch at sunrise. Frame Balanced Rock creatively to convey the precarious nature of this formation. Know when to visit these icons at their photographic best.
Explore Creative Perspectives
Step beyond the standard shots by incorporating creative angles. Photograph Delicate Arch from the lower viewpoint to accentuate its verticality. Set up an aerial camera above the maze-like Fiery Furnace. Shoot a time-lapse of the stars wheeling over the giant arches at night. Use a telephoto lens to compress the layers of fins receding into the distance. Photograph visitors under the arches to convey their immense scale. New viewpoints lead to innovative results.
Practice Safe and Responsible Photography
When composing the perfect shot, maintain situational awareness. Scale slick rock with care. Watch for poison ivy along trails and canyon bottoms. Give wildlife a wide berth. Learn and follow park regulations on flying drones. Time visits to avoid peak hours when parking areas fill. Always stay on marked trails. Follow Leave No Trace principles when going to Arches National Park camping or hiking to photographic spots. With preparation and responsible practices, you can help capture stunning images while protecting this natural wonder. You can learn more about wild animal safari here.
With its endless photogenic rock forms set against picturesque desert skies, Arches National Park satisfies any landscape photographer’s dreams. Follow these tips on optimal timing, creative composition, and photographic techniques for standout results. Your images will showcase the majesty of the park’s geological feats exquisitely framed through your lens. So, grab your camera and tripod to chase the perfect shot in this otherworldly oasis. Don’t forget to put down your camera at times and marvel at these formations with your gaze.